Saturday, January 24, 2015

Painted Polish, Femme Fatales Collection: Part 1 - swatches and review


Hello Friends!


I am a HUGE Painted Polish fan and have been buying pretty much any collection that Lexi (the creator and maker of this polish) dreams up and sells. She specializes in uber gorgeous holographic glitter polishes that you can use as a topper or as a full coverage nail (which I always do) in 2-3 coats. 

But today's collection is a little more unique to her previous collections. The Femme Fatales Collection: Part 1 has multichrome flakies jam packed with holographic glitter. *The colors shift depending of how you are looking at the nail and if you are indoors vs outdoors. I took my photos inside in a light box. 

The first color I am going to show you is a gold/red/green color. It is super unique and pretty darn beautiful. I tried to get different angles and there is a macro pic too. :) This one is called, "Temptress".


The next color is a blue/green/gold/kinda teal color. (Like I said, the color shifts.) I love this one. It's called, "Enchantress'. 


And the last in this first collection and my personal favorite is called, "Seductress". I adore this color and plan on wearing it quite a bit! 


All in all these colors are all so pretty, went on smoothly, and I got full coverage in 2 thick coats, or 3 thiner coats. This collection reminds me of Mardi Gras and I could totally see myself wearing this for a Mardi Gras mani. 

The price for the set is $37.00 or you can buy them individually for $13.00 each.
You can get them here.

Which color is your favorite?

Would you like to see more swatches of other Painted Polish Collections?

Thanks for reading!
<3 Shanna


Tuesday, January 20, 2015

Rainbow Ombre Nails

Hello Friends!

Todays post is to show you my rainbow ombre nails! I did this for a challenge on Instagram, but have been wanting to try it for a long time! It's so pretty!


For these nails I first applied liquid latex so that cleanup would be easier. (Much easier.) 
Then I used a sponge and painted on all the colors of the rainbow, then sponged it on my nails. I repeated that one more time to get it more opaque, then pealed the liquid latex off. I then used acetone to clean up my cuticles and applied a Holo top coat. The one I used is by Fun Lacquer called Diamond. Then I sealed it all off with a quick try top coat. This is the result. So pretty and easy right!?

Here is a picture in the sun so you can really see the holographic glitter shine!


And then I went a step further. I saw a friend on Instagram do it, and since I had the rainbow nails, I needed to try it! Go check hers out. @kadnails on Instagram. 


What do you think? I like both looks, though the sugar coated nails don't really last long. Haha.

Thanks for reading!!!

Love,
Shanna


Saturday, January 17, 2015

BMC Red Carpet Metallic Foil Effect Gel Polish - Review and Swatches


Hello Friends! 

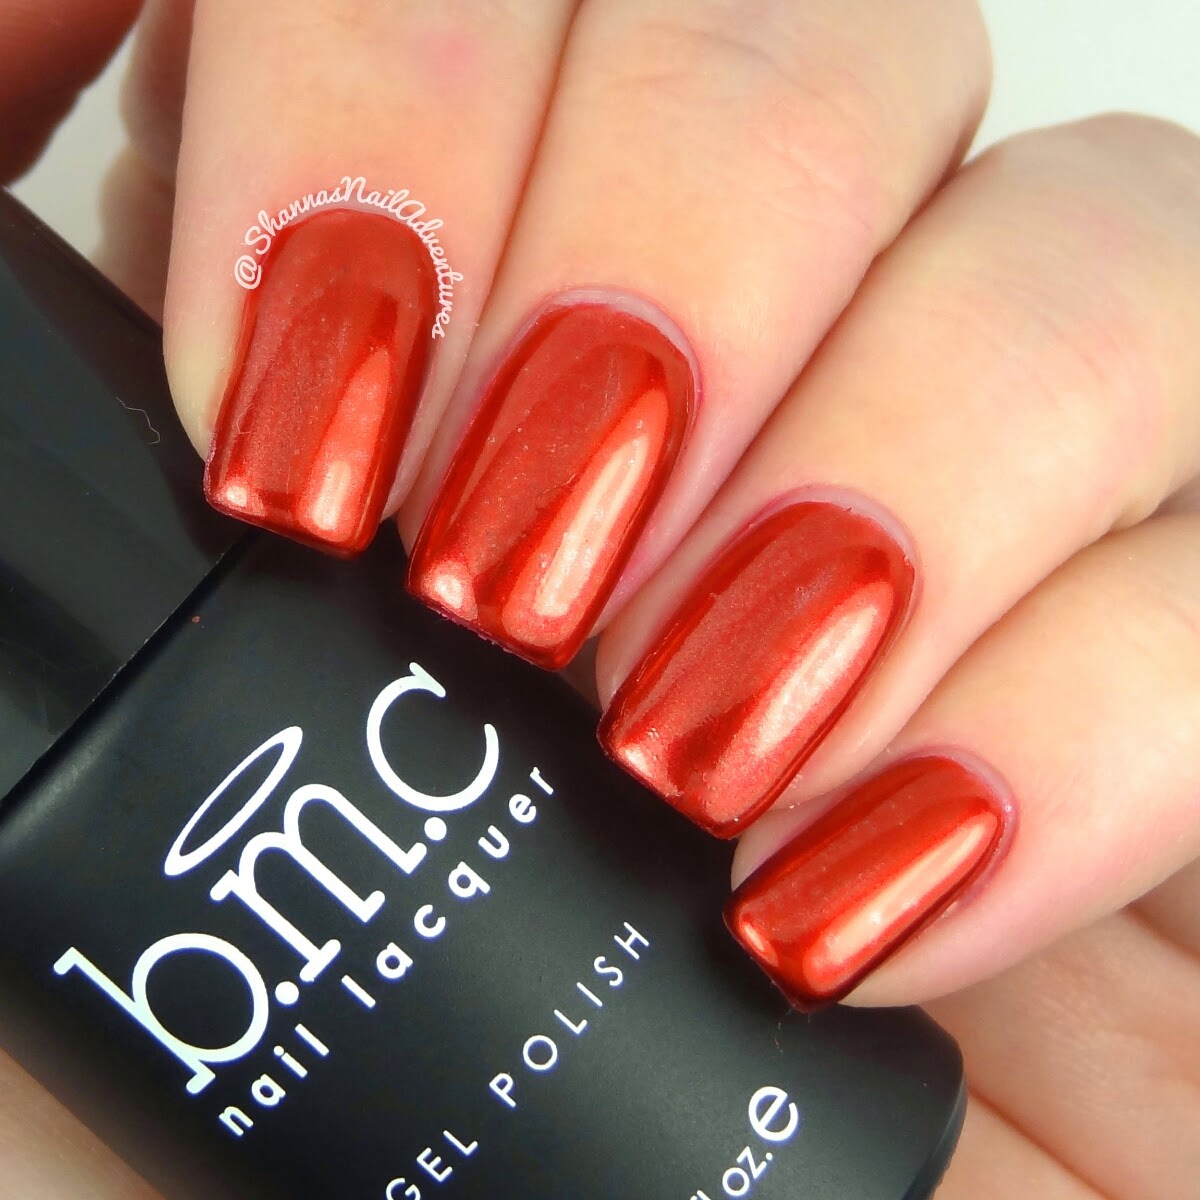
Today I have a the Red Carpet Collection from Bundle Monster to show you.  It is a metallic foil effect gel polish that is super gorgeous, but a little tricky to apply. It took me a few tries before getting it right, but once I did, it was pretty easy. I will give you the directions and some tips, but first, look at these colors!

The first color is a very classy red. I will definitely be using this one more for valentines day!
 It is called, "Miles in Louboutins".


*It looks a little more orange in the picture below than it is in real life. 


The next color is a brilliant royal blue. I love this color! 
It is called, "The New LBD" and is one of my favorites in this collection. 


The next color is a super pretty hot pink! Another good one for Valentines Day! 
This one is called, "Rising Starlet".


The next color is a pretty green. Now I am not a green polish lover, but this one surprised me. Must be the foil effect. :)
This one is called, "Hollywood & Ivy" and it reminds me of dresses I have seen actresses wear on the red carpet. 


Next up is a gold that really shines like gold! It is pretty amazing. 
This color is called, "Paparazzi".


And the last color in the collection and my personal favorite, is a gorgeous purple. I LOVE it. 
It is called, "Photo Op". 


So now that you have seen all the colors, let me give you the directions for application. 


Application Steps: 
  1. Apply your base gel and cure.
  2. Apply a top coat directly over the base gel.  
  3. Remove the tacky layer.
  4. Shake the gel for 30 seconds (like really well). 
  5. Wipe both sides of the brush against the neck of the bottle before applying the product to the nail.  
  6. Apply using side, middle, side application strokes, being careful not to allow each stroke to overlap the next.  If you can get away with only 2 strokes, go with that. 
  7. Allow each coat to rest for about 30 seconds before curing.  It will appear to dry on it's own.
  8. Cure 30-60 seconds depending on your lamp.  
  9. Repeat steps 5-8.
  10. Apply your top coat, being careful not to let the brush drag into the metallic layer below.  

Note: This is a gel polish, but it is unlike any gel I have ever used. It is as thin as water, and if you have too much on the brush, it will flood into your cuticles and stain your skin. (I learned this the hard way.) So, make sure to dip your brush and wipe all the access off on the side of the bottle. The coats must be SUPER thin. 

So what do you think? What is your favorite color?

I have one more picture to show you. I used my favorite color, Photo Op, and dotted on some flowers. 


If you want to get this collection, or just one color, you can go to BundleMonster.com or Amazon to purchase. 

Thank you for reading!

<3 Shanna